Girls Playroom Makeover – DIY PegBoard Tutorial

Need a fun and creative way to organize all your kiddos stuff? Well, I have a great option for you. When it comes to storage sometimes it’s necessary to be creative and think outside the box. I’ve been working on updating a girls playroom lately and like so many of our kid’s spaces the biggest struggle is 1) finding a space for all of their stuff and 2) making it look nice and accessible.
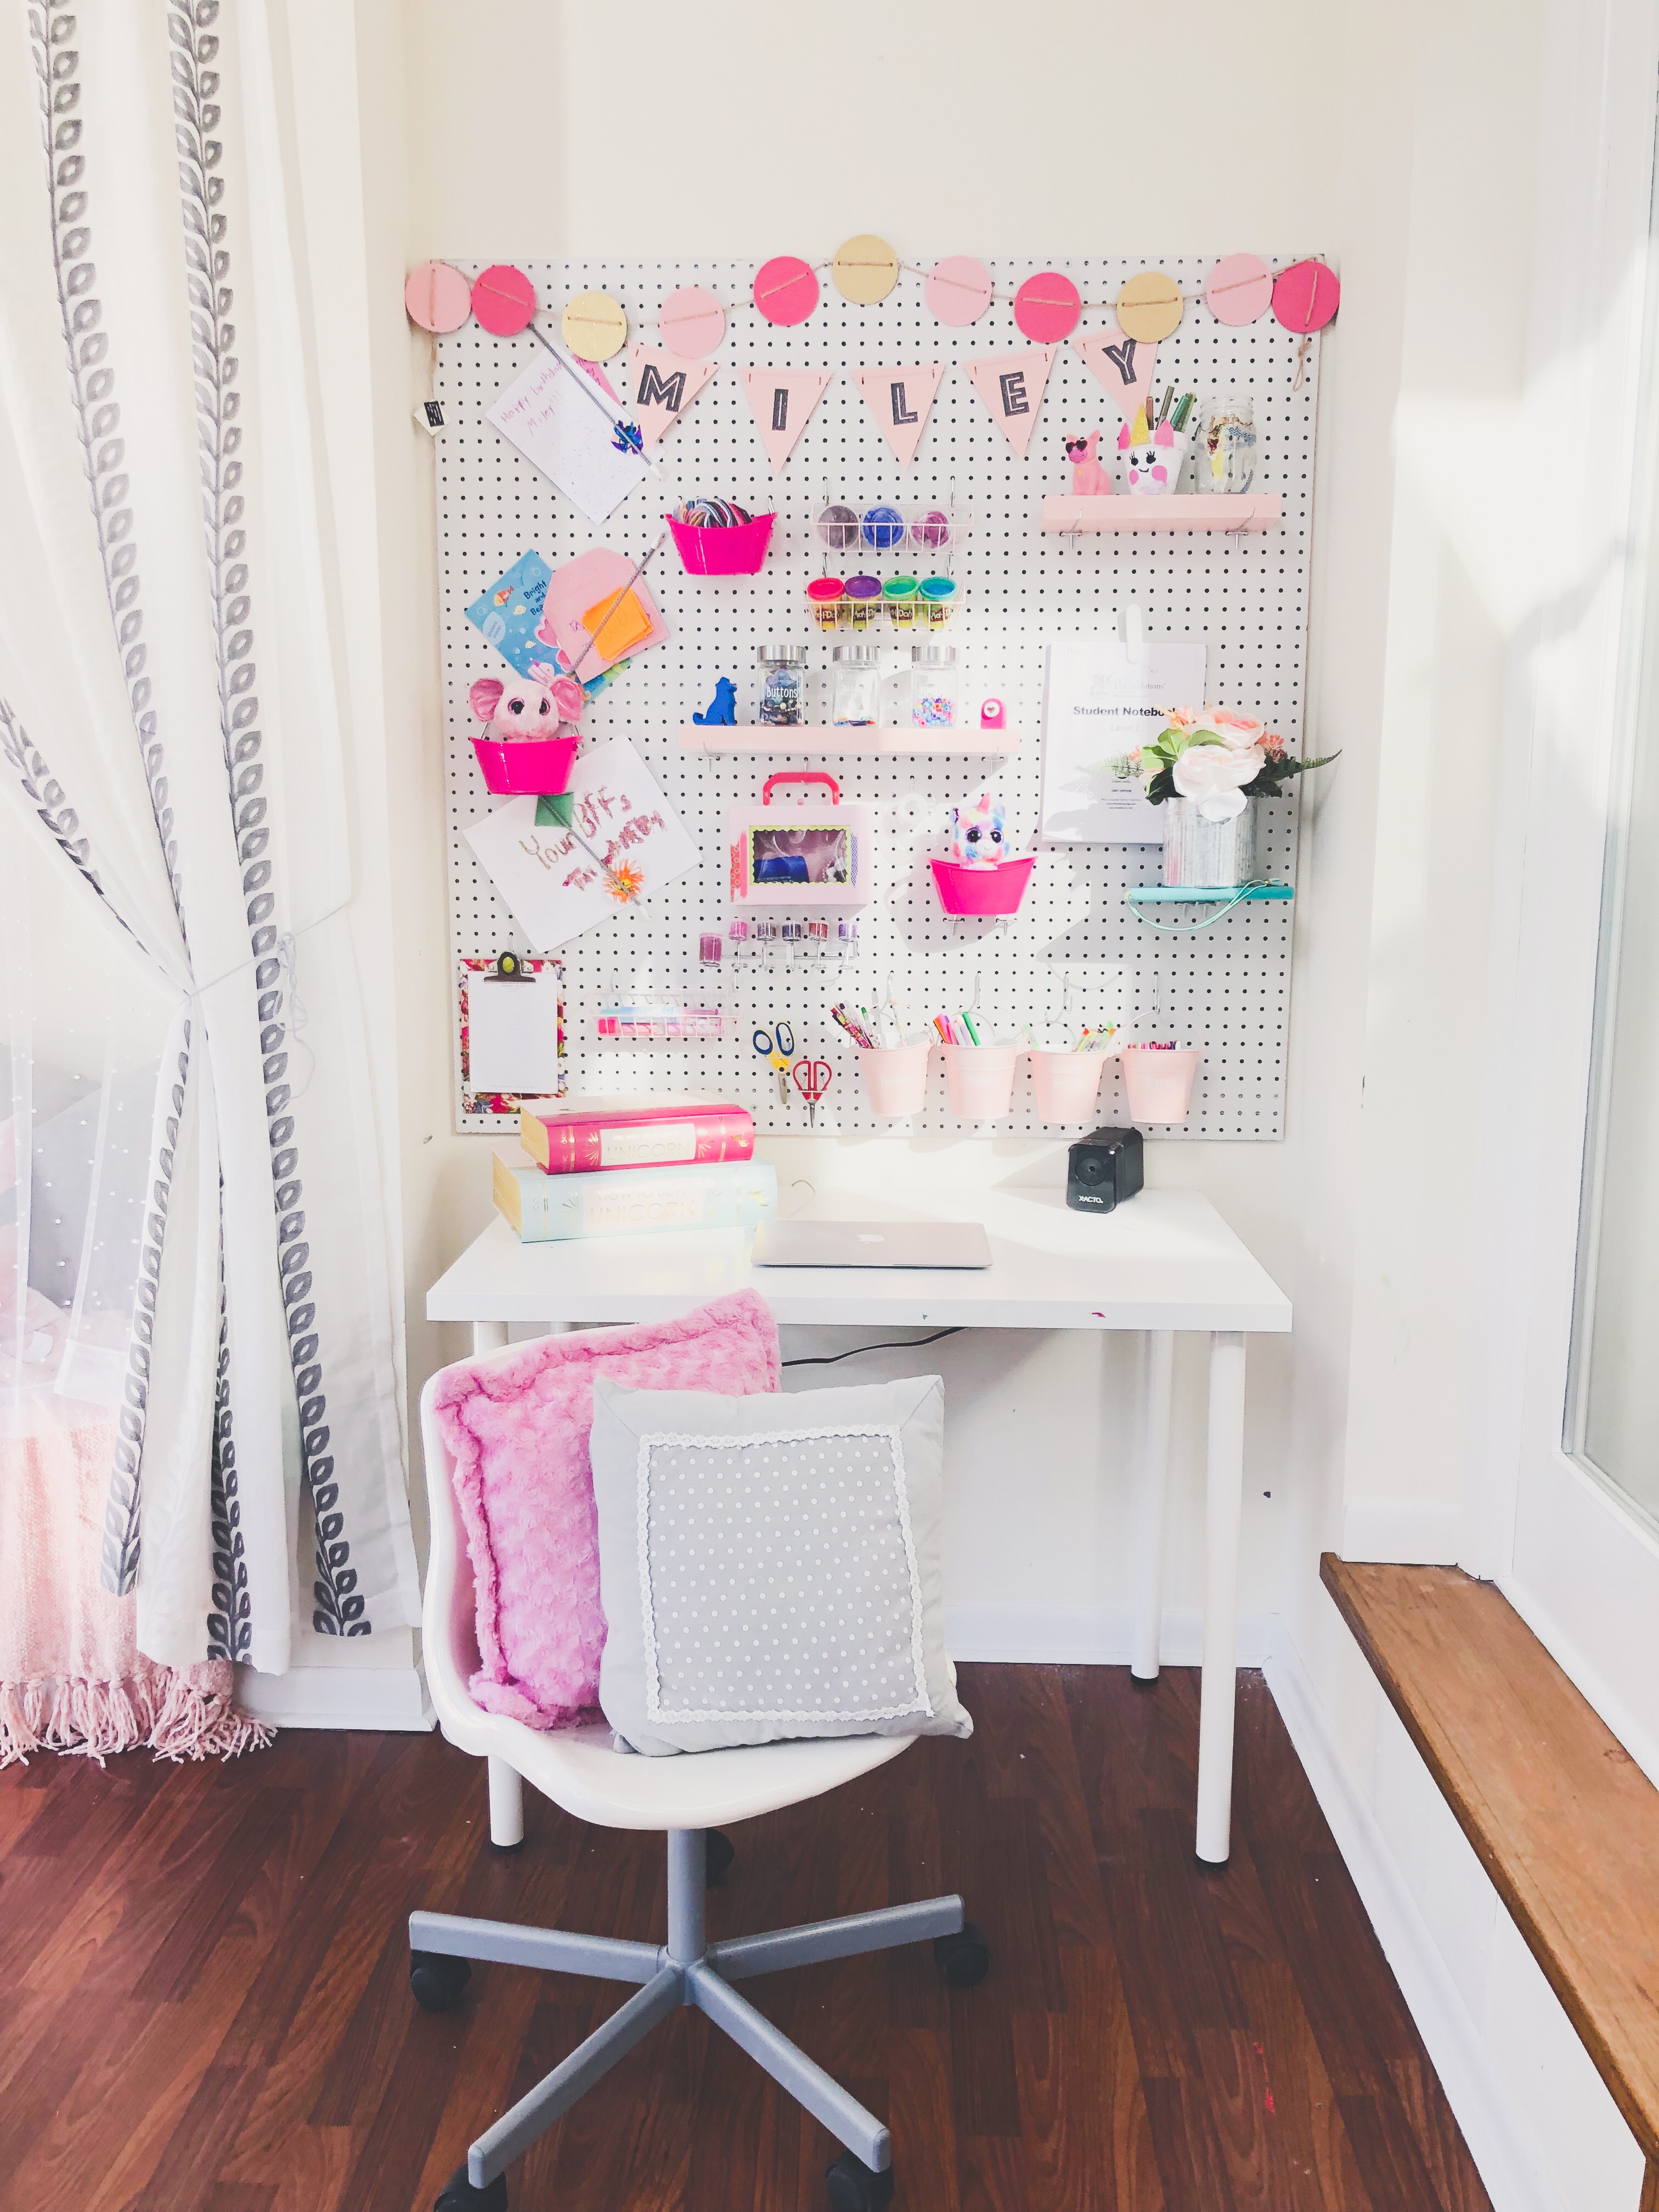
Here is the finished look! I love this room so much…I wanna play in it too!!! This room had so much potential, it is an amazing space with so many windows and natural light. It’s closed off and separate from the rest of the home, so it really is the perfect space for the perfect Playroom. I added lots of little touches to really make this space magical. She now has a music station with added book ledges that I made. A cozy reading nook with curtains, pillow, DIY cushion bench and a custom made frame for a cute focal point. This little peanut is super into crafts and being creative so I wanted an extra special spot for all her creativity. So, I decided on a DIY Pegboard to store all her supplies. Check out the DIY tutorial for the Pegboard at the bottom of the post.
It’s always important to remember where you started from to actually see how far you have come. This is my favorite part looking back and seeing all the progress. Here are a few of the Before and Afters. Special thanks to my amazing clients the B~Family for always trusting all my crazy ideas and allowing me to share all my progress with all of you! 😉
DIY Book/Art Ledge Shelves
Before of Reading Nook
After of Reading NookBefore of Desk Area

After of Desk Area
DIY PegBoard
Supplies:
- Pegboard (mine is a 4 X4)
- Lattice Boards
- 2″ Drywall Screws
- Drill & Drill bit
- Level
- Stud Finder
Making your own pegboard was actually super easy and quick to do. I got my piece of Pegboard from Lowe’s and had the guys there cut it down to 4′ X 4′ to fit the space I needed. You can also cut your piece with a Table Saw, I still don’t have one so until then I rely on the nice guys at the hardware stores…lol! 
Step 1: Let’s find our studs. Realistically they should be every 16″, but you never really know what’s going on behind those walls! Mark all your studs on the wall.
Step 2: Lattice boards were used behind the pegboard, so that the accessories will go into the pegs without hitting the wall. I used 3 boards and cut them each 4′, so they would go across the whole length of the board. I figured out the height and placement I wanted the board to be and marked the top and bottom. Then placed the first lattice board below the top mark horizontally and made sure it was level, I nailed the board in with my nail gun and placed the next lattice board above the bottom mark for where the pegboard should be located and nailed that on in as well after it was level. The last lattice board was place in the middle 16″ below the top board.
Step 3: Hanging the Pegboard. Ideally you would have two people for this part, these boards are pretty big and awkward. I only have two hands, so if anyone ever watched me doing all these parts by myself I’m sure they would die of laughter, I use anything I can my head, legs… so ridiculous!
Make sure your stud marking are above the top and bottom lattice boards. Line up your pegboard onto your lattice boards and locate your studs and which peg lines up the the studs. I started at the top lattice board in the center. Use your drill and drill bit to pre-drill a hole for your screw. Once that is done, use a 2″ screw to anchor the pegboard and lattice board into the stud. Once that first screw is in, life gets a whole lot easier! Make sure everything is level again before you continue anchoring the pegboard into place. I added two more screws to the top lattice board, one on each corners of the pegboard. I moved down to the middle and bottom lattice board adding 3 screws to each, making sure it was completely secure.
Step 4: Once the Pegboard is hung and secure, now comes the fun part Organizing and Decorating. I ordered a pegboard organizing kit from amazon that came with all the pegs. I made a few little shelves with scrap wood I had, it was 1 X 4 and spray-painted them pink. Then I also, added buckets I found at Hobby Lobby and spray-painted them as well. I found a few little wire baskets and plastic baskets at the dollar store and of course spray painted them as well. Then I used my Cricut to add labels to all the craft supplies. Once everything started going up on the board it really started to come alive!!
That’s It!!!
Have fun DIYing…we would love to see your finished project!
Related Products:
This post contains affiliate links. As always, all opinions are our own. Shopping affiliated links helps support our small brand at no additional cost to you, we appreciate the love. For more information, please see our privacy policy. Thank you!


